My latest crafting endeavour - large paper mache letters! I stumbled upon them at JoAnne's a few month ago while trying to come up with a unique baby shower gift idea. I had originally intended on copying a toy block idea I had seen, but they were out of blocks in the size I wanted. However the wealth of paper mache and wooden letters got me thinking. I knew I wanted to do something personalized and my general fear of all thing's baby related ruled out spending much time in Babies'R'us...place creeps me out! So I decided to decorate letters and spell out the baby's name (fortunately my freinds did not change her name last minute when she was born). They turned out so cute that I figured they'd work as a wedding gift for another friend, and while I was at it, shouldn't I have some for myself? After some careful questioning to figure out favorite colors and general decorating style, I set about spelling "family" for my friend's wedding gift. That way she can group picture frames around the word for a whole wall of family related art. I also made myself "NYC" to go with pictures I took while visiting the big apple last year. Here's the run down on how I made them...
 I spread out some paper to keep my kitchen table clean and laid out my letters. I painted the sides of each letter with acrylic paint and let them dry. Next I traced the letter on some scrapbooking paper and cut it to size. I used spray adhesive to adhere it to the letter. My exacto knife helped get the edge's really clean once the paper was on. Next I used a contrasting (or darker in some cases) color of paint to distress the edges and the sides of the letters. I then painted a thin layer of Mod Podge onto them to set the paper and keep it from peeling off. Last I used fun scrapbooking ribbon and embellishments to add some more visual intrest to them. However, they look good with just the paper as well for a more minimalistic look.


 I just used some fun striped card stock and coordinating solid card stock to make them. I printed the wording on cream stock and cut to fit. Then I simply used my circle punch and a bunch of cute Elephant cut-outs from the Cricut to add a cute jungle touch.


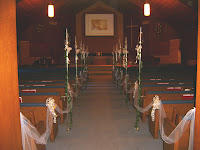
 Upon hearing that the event planner at the church wasn't sure that it would be possible to decorate the pews, I set about proving her wrong. They didn't want us using anything sticky or permanent. Ever resourceful, I rigged a loop of wire that fit just fine without doing any damage.


